Ghostly Mirror - DIY Halloween Decor 2024
Ever felt a pull toward the unknown?
Be careful, for once you beckon spirits, they might linger longer than you'd like. Whether you're prepared or not, these phantom presences often try to communicate through reflections, with a few even attempting to step into our world.
With this Halloween DIY guide, you can effortlessly craft this eerie encounter for a unique and spine-tingling decoration this season.
Materials for the Ghostly Mirror
To conjure up this spectral reflection, gather the following supplies:
- A decorative picture frame with a solid back (doesn't have to be round)
- Doll head
- Double-sided tape and scissors
- Spray adhesive
- Decorative spider webs

Ensure that the head and frame are proportionate to each other. If the doll's head is too small, it diminishes the intended eerie effect.
Pro Tip: Before adding the cobwebs to the doll, consider priming both the picture surface and the doll's head in white. This way, you won't need as many spider webs, since the backdrop and the doll's head won't be as visible. (For clearer visuals, we've skipped this step in this tutorial).
Crafting Step:

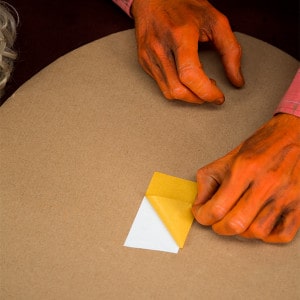
Place a piece of double-sided tape in the center of the picture frame's back wall. Use it to secure the doll's head. Make sure the tape piece is substantial enough to hold the head firmly.

Attach the doll's head to the tape.

Ensure that the tape is sturdy enough to independently support the doll's head for a while. (Once you add the spider webs, the weight will be distributed, providing additional support).

Spray the face of the doll with adhesive. This ensures that the spider webs adhere closely to the face.

Alright, let's get started. Upon removing the spider webs from their packaging, they'll appear similar to a ball of cotton.
Carefully, yet with some force, stretch them apart using both hands until you see a region of fine, thin threads emerge.
Drape these threads over the top of the doll's head, extending them beyond the edges to the back, and wrap them around if possible. (You'll find that the spider webs are impressively stretchy and elastic).

Now you need to work hard: The desired effect will only be achieved if you repeat the process described above very often. (If you have primed the head and back wall white beforehand, it will go faster).

Aim to create as delicate a web as possible. Once the initial layer is in place, you can add smaller pieces of spider web to specific areas as needed. These threads generally adhere well and anchor quickly.

If needed, use the spray adhesive to add extra hold or secure the spun web. Particularly around the face, it might be helpful to spray multiple times to ensure the facial features remain distinct beneath the layers of cobwebs.

Ensure the web is anchored at the edges to prevent it from sagging and to maintain proper tension. At the end, pull the web tight and secure it further, if needed, using some glue. On the back, adhesive tape can also be used for added support.

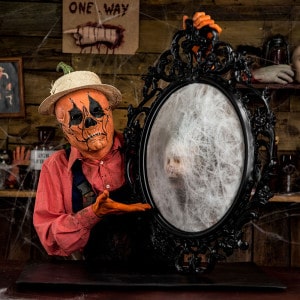
Now, simply place your spiderweb creation inside the picture frame and secure it in place.

And there you have it, a truly spooky and impressive Halloween decoration.


