DIY Halloween Tombstone Decorations 2024 - Spooky Crafting Fun!
Transform Your Space into a Haunting Graveyard
The Perfect Haunting Backdrop
Nothing sets the Halloween mood quite like the ambiance of an aged cemetery. While actual graveyards have their limitations—not to mention they're off-limits at night!—there's no reason you can't capture that eerie atmosphere right at home with DIY Halloween tombstone decorations.
The Challenges of Authenticity
Hauling heavy stone markers or granite tombstones into your backyard or up to your apartment sounds authentically chilling, but in reality, it's a back-breaking endeavor. Plus, genuine tombstones might be a tad too realistic for a fun Halloween gathering. This is where DIY Halloween tombstone decorations come to the rescue.
The Pumpkin King's Solution
Fear not, Halloween enthusiasts! The Pumpkin King presents a solution: craft your own lightweight, spooky tombstones. Using basic materials and a sprinkle of creativity, you can transform any space into your personal haunted graveyard with DIY Halloween tombstone decorations.
These DIY Halloween tombstone decorations promise a perfect, creepy touch for your Halloween celebration, offering both authenticity and convenience. Transform your home into a spine-chilling graveyard and impress your guests with your spooky crafting skills!
Video: How to make Tombstones 💀 DIY Halloween Props
DIY Gravestones: Halloween Decor Ideas
Create Realistic Tombstones for Your Spooky Display
Find Your Inspiration
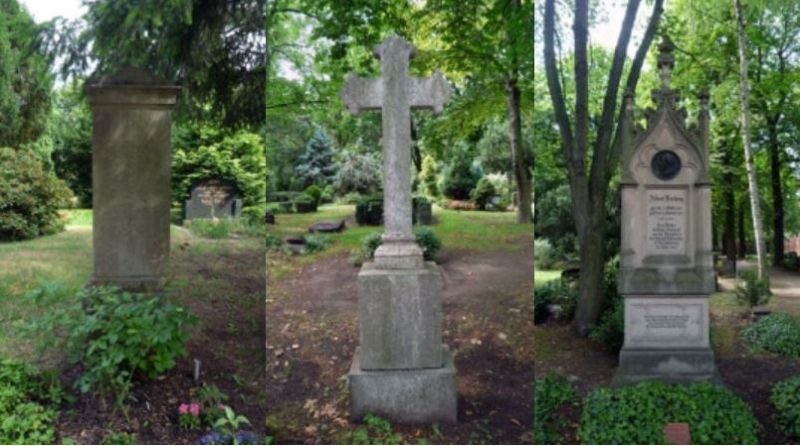
Gravestones come in all shapes and sizes. For some authentic inspiration, consider visiting an old cemetery to see the artistry and history behind these markers up close.

DIY Halloween: Popular Gravestone Designs
Popular Gravestone Designs
We’ll introduce you to four standard gravestone shapes, but remember, the beauty of DIY Halloween projects is the freedom to get creative.
Getting Started Time Commitment:
Varies based on design and quantity. Be sure to account for drying times of paint and adhesive. For example, wallpaper glue might require up to 24 hours to dry thoroughly.
Skill Level:
Ranges from easy to intricate, depending on your chosen gravestone design.
Remember, diversity in design will create a more authentic, haunting ambiance. Too much uniformity might give off a military graveyard vibe, which isn’t quite the Halloween feel most are going for.

Materials You’ll Need:
- Styrofoam Sheets: Various thicknesses recommended. Available at most major hardware stores. Use thicker sheets for primary structures and thinner ones for decorative touches.
- Marking Tools: Pencil, sharpie, or highlighter.
- Measuring Tool: A long ruler.
- Cutting Tools: Saw, utility knife.
- Adhesive and Coloring: Wooden sticks for support, Styrofoam glue, granite-effect spray paint, black spray paint (hardware store finds), brushes, watercolors (gray, brown, black, white, etc.).
- Additional Decorative Elements: Wallpaper paste, model-making grass, leaves, pieces of wood, soil, and bird sand.
This streamlined guide highlights the main points and should resonate well with an American audience keen on DIY Halloween decor.
DIY Halloween Tombstone - Crafting a Spooky Centerpiece
Starting Off: Crafting the Base
Begin with our standard small tombstone model. From a thick styrofoam sheet, cut an appropriately sized piece. Sketch the tombstone's curved top with a pencil and carefully trim the curves and edges using a sharp utility knife.
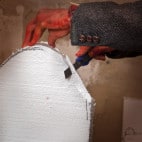

Adding Age and Texture
To give the tombstone an aged appearance, carve thin elongated strips along its sides and make small, irregular nicks. These details emulate wear from time, but be cautious – too many and it may look overly distressed.

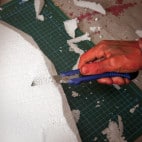


Details and Design
Now, carve in your chosen design – a simple cross, a date, the classic “R.I.P.,” or even a name. A cross is straightforward and always effective. Your tombstone's basic shape is set.


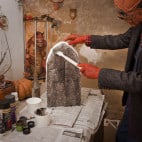

Painting for Realism
Mix a diluted gray (and a touch of brown if desired) paint. Prime the styrofoam with this mixture. Once semi-dry, give it a spray with granite effect paint to capture a stone-like texture. Enhance its depth with a gradient using black spray paint – the base should be darker, blending lighter as you move up. Remember to spray lightly and from a distance to avoid stark lines.


Detailing: Deepening the Design
Using a diluted black paint and a brush, shade the tombstone's carved areas like the cross or any niches. This paint should be thin – dab rather than stroke for a natural shadow effect. Repeat the process with light gray paint, but this time highlighting raised areas like edges.
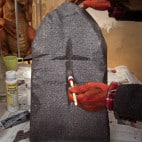


Final Touches: Adding Nature's Mark
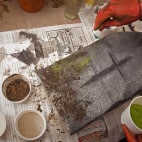
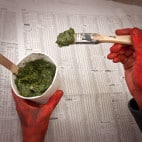
For a more weathered look, prepare a thick mix of wallpaper paste. Incorporate model-making grass powder, bird sand, and a blend of soil and small stone chips (often used in landscaping). Apply the paste to the tombstone where you'd want moss or dirt, then sprinkle the mixed materials. For a varied, natural effect, layer more at the base and use sparingly towards the top. Adhering a few leaves can further enhance realism.



Setting and Drying
Allow your masterpiece to semi-dry. To seal everything, brush over with more wallpaper paste. After drying completely (typically a day), you'll have a sturdy, mess-free tombstone ready to spook your Halloween guests!


DIY Large Halloween Tombstone Craft Instructions
Crafting a Large Tombstone for Halloween?
While this project has multiple steps, it's built on a simple foundation.
Here's what you'll need:
- A thick styrofoam sheet for the main body and top.
- A medium-thick styrofoam sheet for the center section.
- A thin styrofoam sheet for the slanted roof and plaque.
Follow along, and you'll have a spooky tombstone decoration in no time!


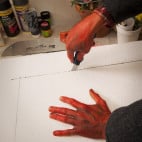

On the thick foam sheet, sketch the main body and the top part. Then, carefully cut out the shapes using a sharp utility knife.
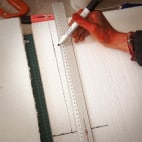
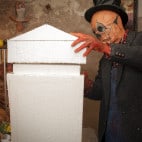

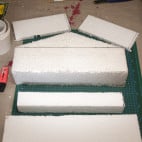
Next, cut the connecting section from the medium-thick foam sheet.
Ensure it's noticeably narrower than both the main body and the top part.
As a preliminary step, assemble the pieces to check the fit. You might need to trim some sections for a better fit.
When cutting out the roof pieces, make sure they're sized to slightly overhang the edges. A good way to do this is by using the top part as a stencil. Place it face-up on the thin foam sheet and trace around it with a marker, leaving about a half-inch border for the overhang.
At this point, you should have all your primary components ready.


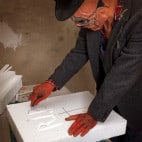
Trim the decorative strips to the desired length.
Before assembling all the pieces with glue, etch a cross or a tombstone inscription using a utility knife.

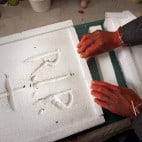

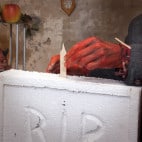
First, use polystyrene adhesive to attach the decorative strips. After that, glue the three primary sections together.
For added stability, consider reinforcing the connection by using a pointed wooden stick or a sharpened popsicle stick.
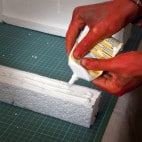
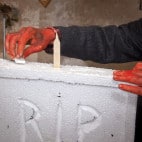

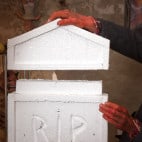


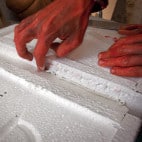

You can fill in any gaps between the pieces using styrofoam adhesive.
Lastly, attach the roof sections to the slanted parts of the main structure. Use a utility knife to angle the edges where the pieces meet, ensuring a clean, pointed edge for the roof.
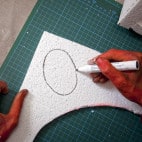

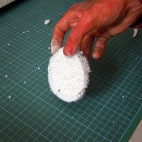
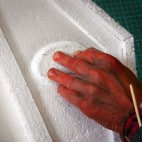
If you'd like, you can fashion an oval plaque from the leftover thin styrofoam, reminiscent of those seen on many vintage tombstones, often bearing the portrait of the departed. Angle the edges for a refined look and affix the plaque where it looks best.
For painting and detailing, follow the same steps as you would for a smaller tombstone.
The Result
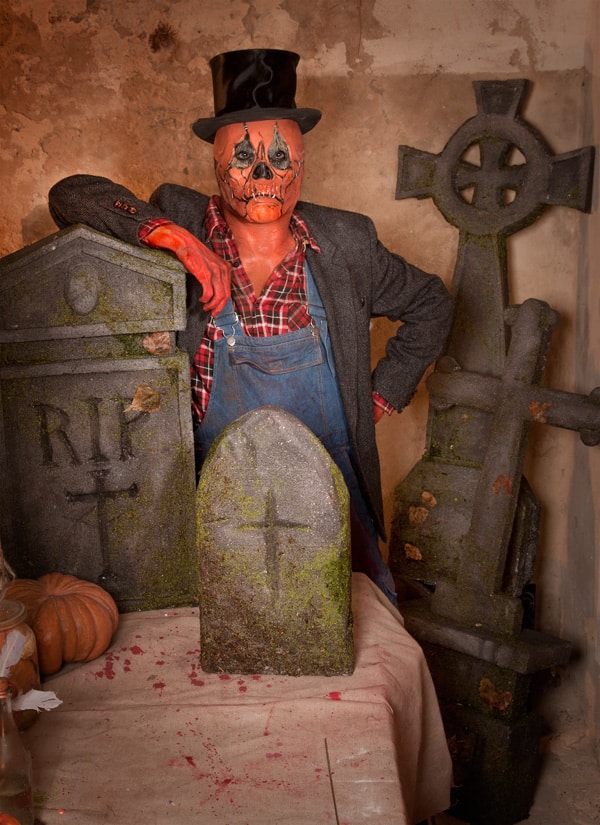
As an inexpensive alternative for your own funeral, however, Styrofoam gravestones are not too serene. (They fly away too quickly.)
Well, have fun crafting!


